Experiencing a Windows 11 boot loop can be incredibly frustrating, transforming your computer into a seemingly endless cycle of restarts that disrupts productivity. When your system continuously fails to load the login screen and instead repeatedly attempts to restart, you’re facing a critical technical issue that demands immediate attention.
This persistent reboot problem can stem from various causes. So, what do you do? Let’s look at some ways to diagnose and resolve the Windows 11 boot loop, helping you restore your computer’s functionality and get back to work.

Credit: Microsoft
What causes a Windows 11 PC to keep restarting?
There’s no single cause for a Windows 11 PC getting stuck in a reboot loop. A reboot loop can be caused by an issue with your computer’s power supply, a malware infection, overheating, or even hardware drivers. Here are the different things to check if your Windows 11 laptop or desktop keeps restarting.
Fix #1 – Boot your PC into safe mode
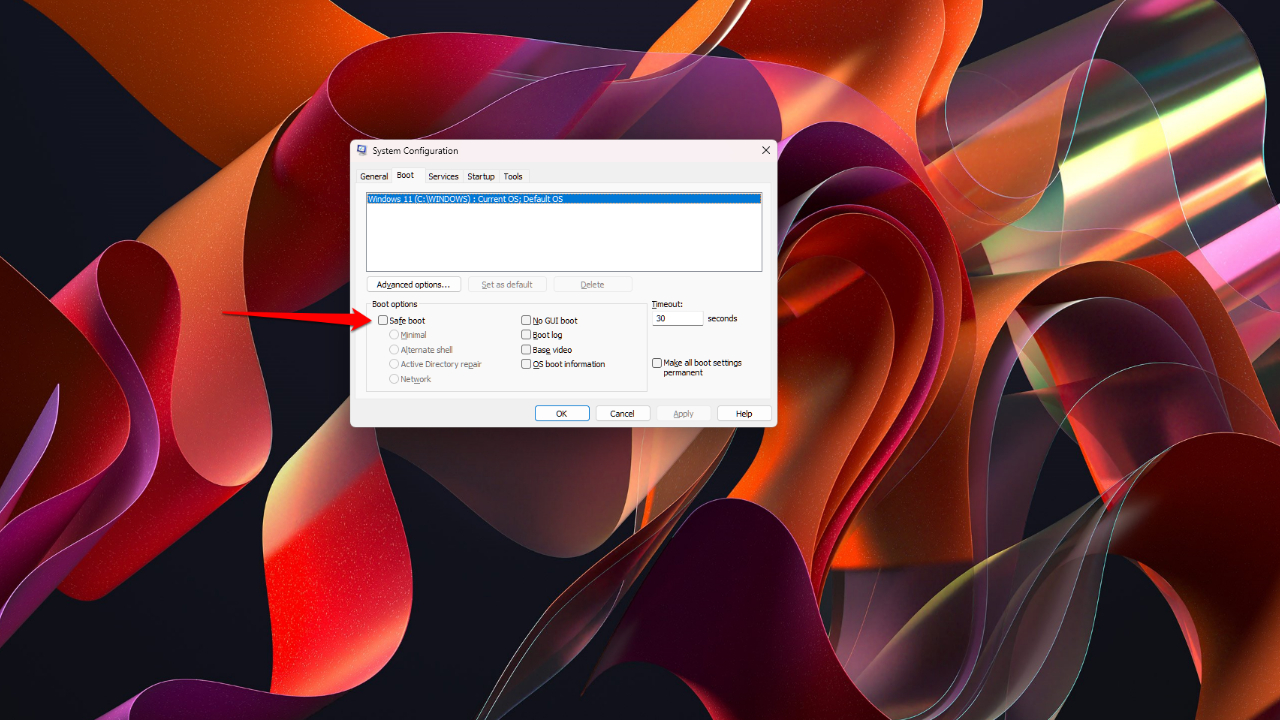
When you are troubleshooting any problem on your PC, you should boot your computer into safe mode. If when you’re PC is in safe mode it no longer experiences the restart loop, then this means that the default Windows 11 settings and drivers aren’t causing the issue. This allows you to narrow down the sources of problems causing your Windows 11 PC to crash, making it easier to troubleshoot. Here’s what you need to do to boot in safe mode:
- Press the Windows Logo key and R at the same time.
- Type msconfig in the box
- Press OK
- Under Boot Options, click the Safe Boot checkbox.
When your computer restarts, it will automatically restart in safe mode. If your computer restarting is making it difficult to follow these steps, you can also follow these steps at the sign-in screen:
- Hold the Shift key while clicking the Power icon
- Select Restart
- Your PC will restart
- Once your PC restarts, you will see a Choose option; click it
- Select Advanced Options
- Select Startup Settings
Now, when your PC restarts, you will be presented with a list of options. Select 4 or F4 to start your PC in safe mode. If you need to use the internet while the computer is in safe mode, you can select option 5 or press F5.
WINDOWS 11 TIPS AND TRICKS YOU DIDN’T KNOW YOU NEEDED
Fix #2 – Remove any new software
If your automatic rebooting problem began after installing a new app, uninstall that app and monitor your PC. If you still notice your PC restarting, there’s a chance that the app has infected your system settings before you uninstalled it. To fix this, you’ll need to restore the system. To do a system restore, you should first boot your PC into safe mode and then follow these steps:
- Open the Control Panel
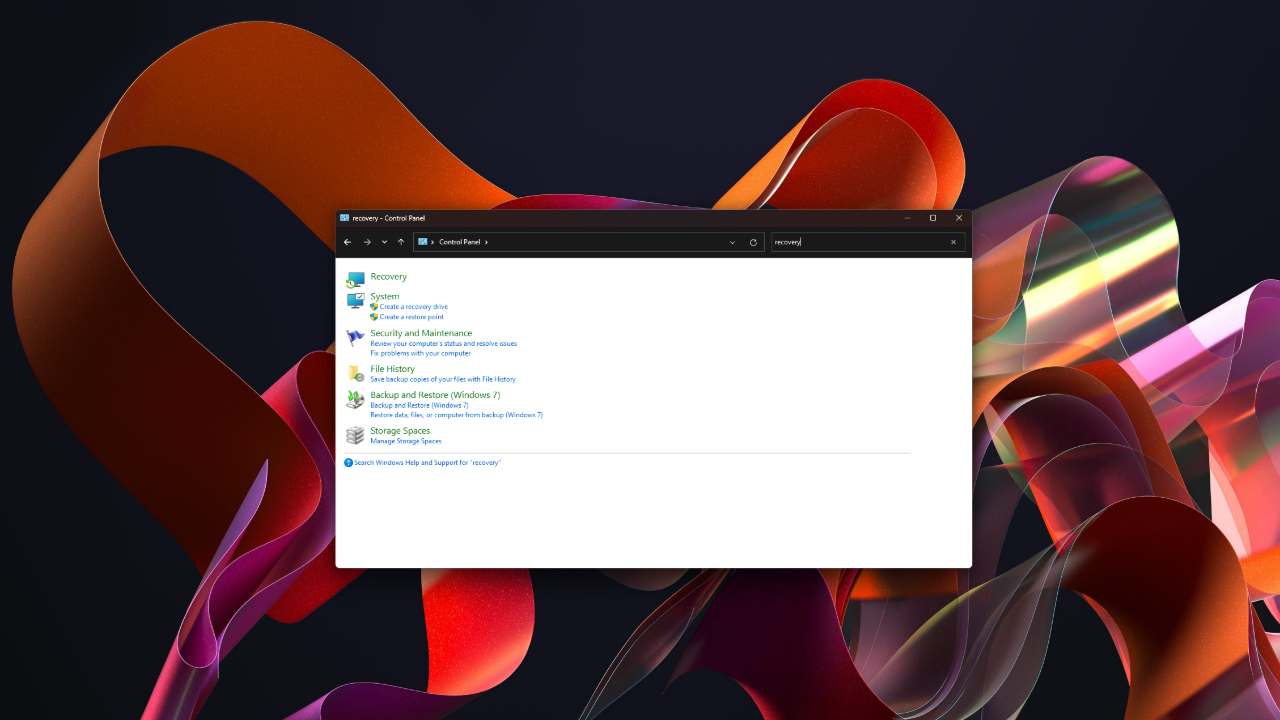
- Search the Control Panel for Recovery

- Select Recovery
- Choose Open System Restore
- Click Next
- Now you will click on your hard drive, and select finish. Your computer will automatically restart.
Fix #3 – Make sure your computer isn’t overheating
An overheating laptop or desktop will try to prevent damage to critical hardware components by shutting itself down. This is one of the leading causes of a Windows 11 PC getting stuck in a restart loop. If you’ve noticed your desktop giving off a lot more heat than usual or a laptop feeling hot to the touch, chances are you have an overheating issue.
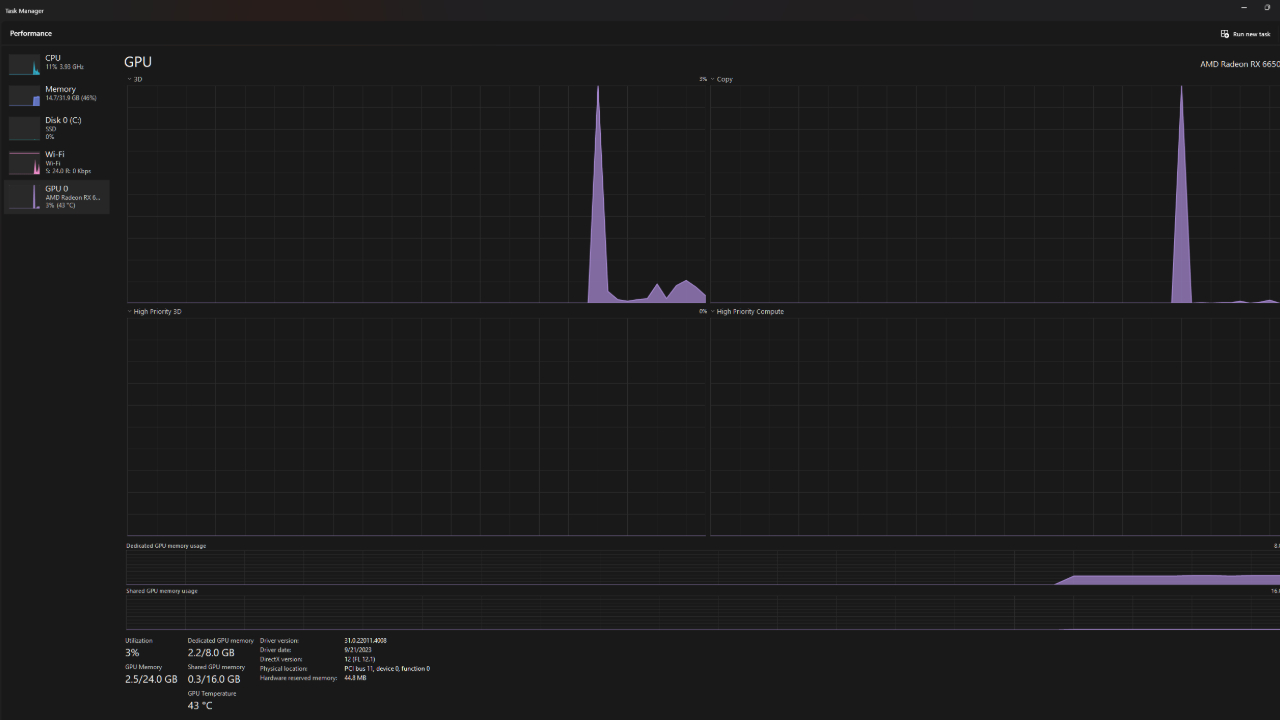
A computer’s CPU and GPU generate the most heat, so I recommend monitoring those hardware pieces to see if they are overheating. You don’t need any additional software to monitor the temperatures of your GPU, as some temperature readings are built into Windows 11. Here’s how to check on your hardware temperatures in Windows 11:
- Open the Task Manager
- Click the second tile, Performance, on the left-hand side of your screen
- From here, you can click GPU, which will show you your GPU temperature

Unfortunately, the built-in temperature reading doesn’t read your CPU temperature, and you’ll need to manually go into the UEFI/BIOS to check the temperature without installing any additional software. However, there’s a multitude of free-to-use apps that manufacturers have developed to measure your CPU temperature, including Core Temp, HWMonitor, or Open Hardware Monitor.
When you open one of these monitoring tools, you’ll be able to view your PC’s stats, including CPU and GPU temperatures and loads. If your CPU or GPU is running too hot, try cleaning the components to remove dust. For custom-built desktops, adding more exhaust fans to the case can improve airflow and cooling. Persistent overheating, especially in older laptops, may indicate that it’s time to consider upgrading your machine.
TAKE YOUR WINDOWS PC’S SECURITY TO THE NEXT LEVEL
Fix #4 – Check for issues with your PC’s power supply
A computer will randomly restart when it has a failing power supply unit (PSU). If you have an issue with your power supply, you’ll know if your computer won’t restart or turn on. In addition to causing shut-offs and restart-loops, a faulty power supply can also cause a blue screen of death error. In severe cases, you might even smell a burning scent or witness smoke coming from your PC’s power supply exhaust vent. If you use a laptop with PSU issues, you cannot send your computer to a repair shop or the manufacturer for repair.
Desktop PC owners have it a bit easier, assuming they have a pre-built PC that can be altered easily. If you do have a desktop, turn off and unplug your computer before going into the case to investigate if dust build-up is affecting your PSU. If your PSU fails, you must purchase and install a new one.
Fix #5 – Scan your PC for viruses

Malware and other viruses are a common cause of a crashing or constantly restarting PC. The easiest way to do this is by using strong antivirus software.
My top pick is TotalAV, and you can get a limited-time deal for CyberGuy readers: $19 your first year (80% off) for the TotalAV Antivirus Pro package.
Get my picks for the best 2025 antivirus protection winners for your Windows, Mac, Android & iOS devices.
If your computer is stuck re-booting, you may need to boot into safe mode in order to run an anti-virus application. Here’s what you need to do to boot your PC in safe mode with Windows 11:
- When your computer restarts, at the sign-in screen, press and hold the Shift key
- Click Power
- Click Restart
Now, your computer should act more stable after booting in safe mode, allowing you to run an anti-virus scan.
10 USEFUL WINDOWS KEYBOARD SHORTCUTS YOU NEED TO KNOW
Fix #6 – Disable automatic restart
If you have automatic restart enabled in Windows 11, your PC will restart every time it encounters a system failure. You can easily disable this future within the Windows 11 command prompt. Here’s what you need to do:
- Press the Windows key + R on your keyboard
- Type sysdm.cpl and click OK
- Select the Advanced tab
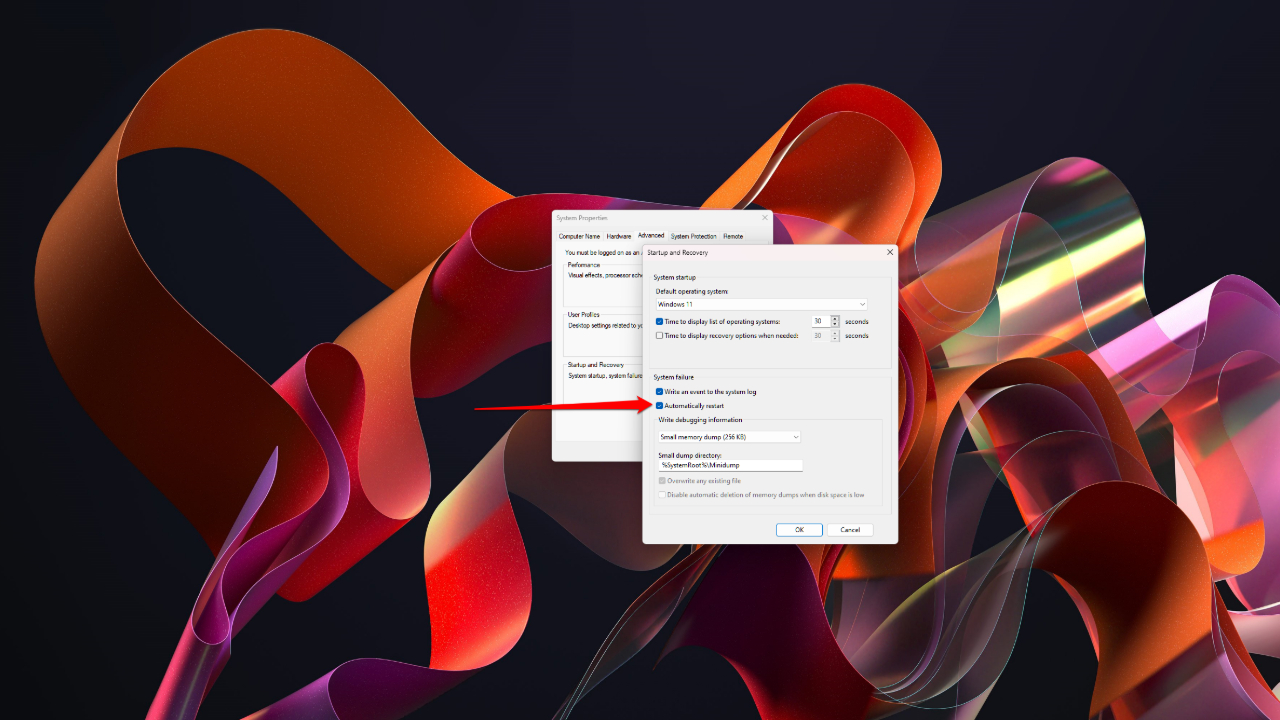
- Under Startup and Recovery, click Settings
- Under System Failure, uncheck the box Automatically restart.
- Click ok.
Keep in mind this isn’t a fix for the problem, but it will help you further troubleshoot the restart loop problem by disabling automatic restarts.
Fix #7 – Repair your system files
An issue with your Windows 11 system files may be causing your PC to constantly restart. If you think a corrupted system file is why your PC keeps restarting, there’s a quick and easy fix you can do within the Windows Powershell. The System File Checker (SFC) is a built-in tool that will scan your Windows system files for corruption or any other changes. If a system file has been modified, it will automatically replace the file with the correct version. Here’s how to run the SFC command:
- Open the Windows Powershell (or Command Prompt)
- Type in sfc /scannow
- Press Enter
- Leave the command prompt window open until the command completes, which could take some time.
If there’s no problem with your Windows system files, after the scan, you’ll see a message that says, “Windows Resource Protection did not find any integrity violations.” If you instead see a message saying, “Windows Resource Protection found corrupt files but was unable to fix some of them,” you should try running SFC again but in safe mode.
Fix #8 – Check for RAM issues in the command prompt
Your PC might be restarting itself because it doesn’t have access to enough Random Access Memory (RAM). Windows 11 may become unstable without enough RAM in your computer, causing the OS to randomly reboot. You can use the built-in Memory Diagnostics Tool in Windows 11 to check your computer for issues related to RAM. Here’s what you need to do:
- Press the Windows Key and R
- Type mdsched.exe in the text box
- Click OK
- Select Restart Now and Check for Problems.
When your PC restarts, the Windows Memory Diagnostics Tool will check for any RAM-related issues; if the test detects an error, take note of the error code. You can check the error code online to find the correct fix for that specific error.
Kurt’s key takeaways
These are the best fixes for a computer that is constantly restarting. While you can perform these fixes at home, it might be your best bet to send your computer to a repair shop or back to the manufacturer if you continue having an issue with your Windows 11 PC being stuck in a restart loop after these fixes. It also may be time to invest in a new laptop if you are experiencing a system slowdown and random restarting on your Windows 11 PC, but I would recommend trying to fix the problem first before buying a new machine.
What was the most challenging computer technical issue you’ve ever encountered, and how did you resolve it? Let us know in the comments below.
TO GET MORE OF MY SECURITY ALERTS, SUBSCRIBE TO MY FREE CYBERGUY REPORT NEWSLETTER


 English (US) ·