I’m not a big fan of isometric exercises, which involve holding the body in one position for a set time. I know that static exercises, such as the plank, are effective and challenging, but I prefer moving when I’m working out — to breathe harder and feel my heart beat faster.
That said, isometric training can build endurance and be useful for people with an injury or conditions such as arthritis trying to maintain or build strength. I tend to steer clear, but saying that, I’m always open to a challenge, so when I came across a classic isometric exercise called the wall squat, complete with arm raises (movement!), I immediately leaped into action.
What is the wall squat with arm raises?
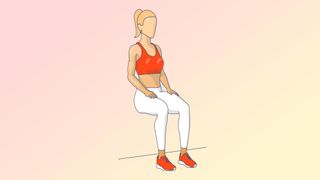
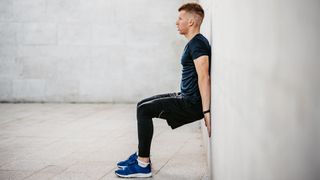
The wall squat or wall sit is great if you’re just starting to exercise and want to build strength without setting foot in a gym. All you need is a wall and some patience, so the move can be performed almost anywhere.
Wall squats primarily target the quads, those big muscles that run along the fronts of your thighs. Want to run, jump, or even climb a flight of stairs with ease? Get to work on those quads. The static squat variation also works the glutes and engages your core to maintain position.
For this challenge, I was more interested in the movement aspect of the exercise. Wall arm raises (also known as wall angels) are great for working the muscles in the mid and upper back, which keep the shoulders pulled back and promote overall good posture. These include the rear deltoids, rhomboids, latissimus dorsi and erector spinae.
Most of us don’t work these muscles nearly enough, which means we could do with improving our posture. Bad posture can lead to back and neck pain (no surprise there), but it can also affect balance and breathing and has even been linked with digestion problems, incontinence and constipation. In short, wall arm raises are a darn good idea.
How to do wall squats with arm raises

- Lean against a wall, feet about hip-width apart or a little wider
- Flatten your back against the wall or as close as you can comfortably maintain
- Avoid pushing your chest out, which will make it easier to achieve a flatter back
- Walk your feet forward and lower yourself into a squat position. Your knees should form a 90-degree angle (thighs parallel to the floor)
- Adjust your feet so your knees are directly over your ankles
- Slide your arms up the wall until your elbows align with your shoulders and your hands point to the ceiling, palms facing outward. Your arms should be at 90 degrees
- Keep your arms connected with the wall, then raise them as far as you can
- Ensure your back also stays in contact with the wall as you lift your arms
- Pause, then slowly lower your arms to the start position. That’s one rep
- Aim for 3 sets of 10 reps to begin with.
Wall Sit with Arm Raise - YouTube

If you feel any discomfort, stop. If you have difficulty keeping your arms in contact with the wall, don’t worry and don’t overdo the effort; it’s quite likely your back muscles aren’t used to this movement, so go slow and give them time to stretch and warm up.
I did this move at various points during my work day — I’d get up from my desk (I work from home), do the exercise, and then return to my desk a changed man, posturally, at least. Changed for the better, I should add.
This is probably the easiest exercise to incorporate into a workday that I have tried for Tom’s Guide, and it’s a great daily reminder to sit straight. I have no excuse to not manage at least one set a day, and I think you’ll feel the same way. Here’s what happened when I committed to them for one week.
The move helped stretch my back
I run a lot and my legs are in reasonable shape, so I wasn’t worried about maintaining the squat. But I knew the arm raises would find my weak spots. On the first day, I did three sets of 10, and the back stretch I felt amazed me.
This is a relatively simple move but, for most, I suspect, an unfamiliar one. I’m no stranger to dumbbell exercises that target the back, such as the bent-over row and reverse fly, but simply raising and lowering my arms made me more aware of my back muscles and what they do than any weighted exercise.
I felt it mostly in the mid and upper back and it drew my attention to their importance in helping me simply stand straight. When I was done, the harshest drill sergeant would have nothing but kind words about my posture.
I improved throughout the week
By the end of the week, I was up to three sets of 25 reps, with 30 seconds between sets. I wasn’t stronger (of course), or fitter, but my back muscles were being stretched daily, so it became far easier to do the move and more enjoyable as the days went by.
I found it easier to keep my arms in contact with the wall (don’t focus on this to the detriment of the overall move) and could slide them higher by the end of the week. And of course, my quads and glutes also worked hard to keep me in position.
If, like me, you find the arm raises the main event, don’t neglect the support act: ensure your lower body position is correct so you get the most from the squat.
I tried wall squats with arm raises every day for a week, and here's my verdict
As I sit here at my desk documenting this week, I’m sitting tall without thinking about it. While it’s quite likely I’ll revert to a slight slouch later in the day, all I have to do is check in with my posture and, if need be, find a wall. From there, I can simply put my back into it.
More from Tom's Guide
- I did 50 Captain's chair crunches a day for a week — here's what happened to my abs
- I did a single-leg wall sit every day for a week, and here's what happened to my legs
- Squats: How to do them and the benefits for building leg strength and muscle


 English (US) ·