Apple’s latest iOS 18.1 update introduces a range of tools designed to support health and accessibility, and one standout feature is the new hearing test you can take using the AirPods Pro 2. With this feature, iOS uses advanced audio diagnostics and personalization capabilities, helping you assess and optimize your hearing health in real time.
Integrated with your AirPods Pro 2, this tool can provide insights into how well you perceive different sound frequencies and tones, potentially offering early indicators of hearing challenges. With iOS 18.1, Apple Intelligence can also summarize audio notes and phone call transcripts, send Smart Replies in Apple Mail, and even includes its own version of Android’s Magic Eraser, Clean Up.
In this guide, we’ll show you exactly how to take Apple's hearing test. It's important to note that the test and hearing aid features are intended for people 18 and over. The hearing test should also be taken in a quiet environment. Let's get started!
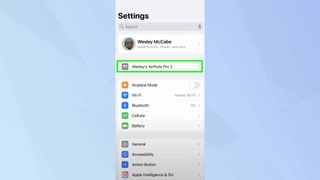
1. Go to Settings
(Image: © Apple)
Make sure your iPhone is updated to the latest version of iOS and that your AirPods Pro 2 are on the latest firmware. You can access the hearing test in Settings or the Health app. For the purpose of this guide, we're starting in Settings. Then, tap your AirPods.
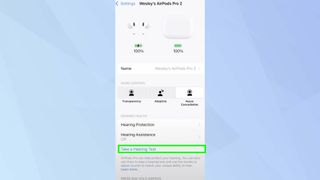
2. Access the hearing test
(Image: © Apple)
Tap Take a Hearing Test, followed by Get Started. The test will take around 5 minutes and you can exit any time. It's important to note that
your results will only save if you complete the test.
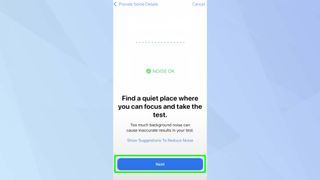
3. Prepare for the Test
(Image: © Apple)
Answer the questions displayed on the screen, and confirm that you are in a quiet location to ensure accurate results.
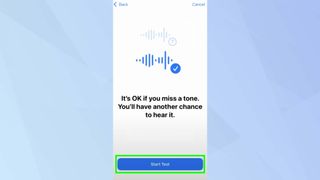
4. Start the test
(Image: © Apple)
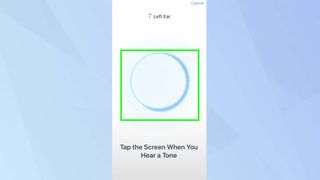
Once you've gone through all the prompts, tap Start Test. The assessment will begin with your left ear, so be ready to listen closely.
5. Listen closely
(Image: © Apple)
Focus on the tones played during the test, each tone will pulse three times. Tap the screen whenever you hear a tone, and then the test will proceed to your right ear.
6. Once the test is complete
(Image: © Apple)
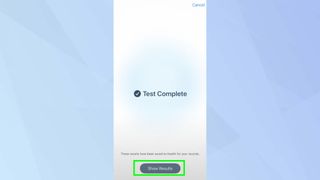
After the hearing test is complete, you'll be notified that your results have been saved. Tap Show results.
7. Review your results
(Image: © Apple)
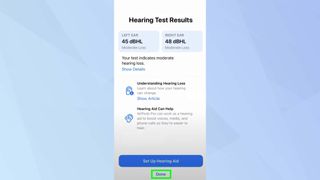
Now you'll be able to see your hearing test results. To review any hearing assistance or recommendations, tap Show Details. Your data will be saved in the Health app for you to access. One finished, tap Done.
Now that you've learned how to take Apple's hearing test, why not explore other iOS 18.1 features? If you're looking to make the most of your moments, check out how to create a memory movie with Apple Intelligence. For help with documents and messages, Writing Tools is one of Apple Intelligence's most useful features — here's what it can do. And for less well-known features, check out iOS 18 Notes just got a major overhaul — here's how to use it.



 English (US) ·