While iPhone Pro users have the option to record ProRes footage using their smartphones, Android users do not have any comparable options. However, there’s one app that can unlock the true potential of your phone’s camera system by letting you record 10-bit CinemaDNG RAW footage from your device. The app is called MotionCam Pro and it fetches Rs 2,600 on the Google Play Store. If you want a taste of what it does, you can install its free Demo version on your phone. Let’s take a look at how you can record RAW videos on your Android phone using MotionCam Pro.
Read Also: Top 10 apps for OnePlus 13
What are RAW videos? When should you shoot them?
The videos you shoot using your smartphone’s cameras are highly optimised and processed. Android OEMs choose to do this for several reasons. To begin with, taking care of the processing phase makes smartphones incredible point-and-shoot devices. The videos flaunt a good colour profile and pack a lot of detail. Users don’t have to spend time editing the footage to get the desired result. Every Android OEM has its own signature when it comes to processing videos. If you shoot a scene with 3 different smartphones, you will get 3 distinct results. In the processing phase, your smartphone makes the tradeoff between video quality and file size. The final videos lose some of the details but they have a manageable file size.
Meanwhile, a RAW video bypasses the processing stage entirely. When you shoot RAW footage, your device solely relies on the camera sensor to record the scene and does not colour-correct or compress the video. As a result, you get access to truly neutral footage with every last detail. This also comes with complete editorial control over the video. You can apply the colour palette of your choice and control aspects like exposure, white balance, and more.
Record RAW videos on your Android phone using MotionCam Pro
Step 1: Download the MotionCam Pro app on your phone. The app is currently priced at Rs 2,600 on the Play Store, but there is a free Demo version on offer too. However, the recording limit on the Demo version is set at 5 seconds.
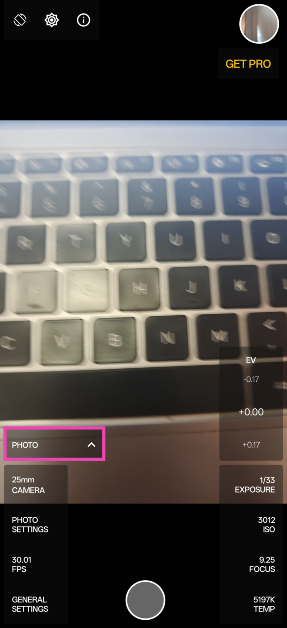
Step 2: Launch the app and tap on Photo on the left side of the screen.
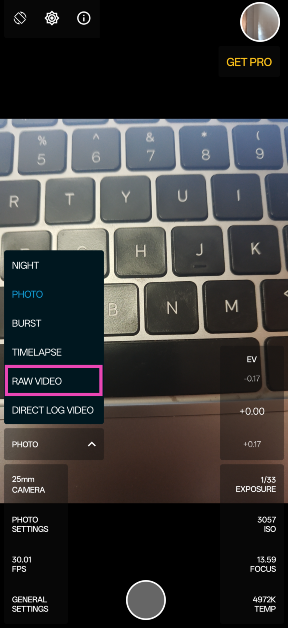
Step 3: Select RAW Video from the list of options.
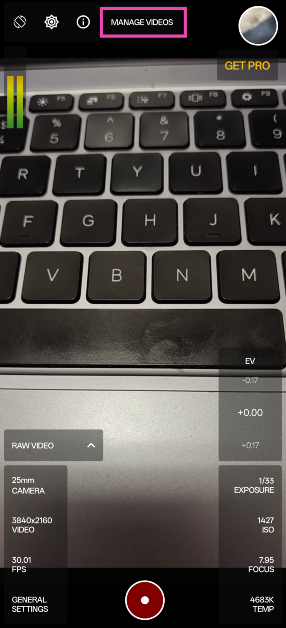
Step 4: Use the on-screen controls to change the lens, resolution, frame rate, aspect ratio, exposure, and other settings.
Step 5: Hit the red button to start recording a video.
Step 6: Once the video has been recorded, it will be saved as a ZIP file. Tap on Manage Videos to access it.
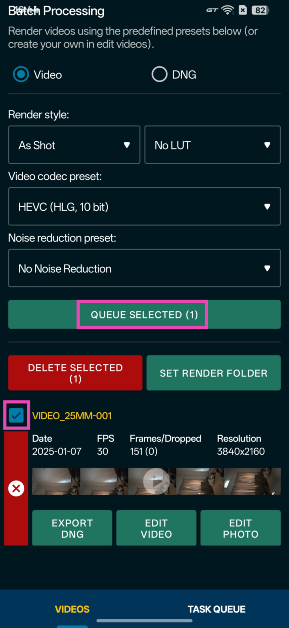
Step 7: Hit the checkbox next to the video and tap on Queue selected.
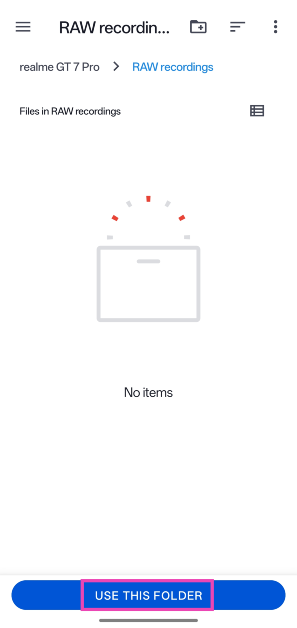
Step 8: Select the destination folder for the video and tap on Use This Folder.
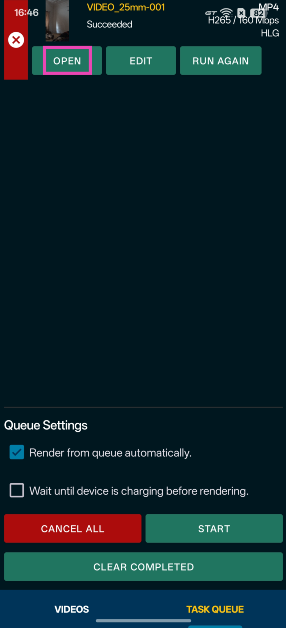
Step 9: Switch to the Task Queue tab to view the rendering process. Once the video has been rendered, tap on Open. You can also find the RAW video in your phone’s native gallery app.
Step 10: Load the video in an editing app that supports CinemaDNG RAW files. Apps like Lightroom and DaVinci Resolve are great tools for editing RAW footage captured using your phone.
Frequently Asked Questions (FAQs)
Can you shoot RAW videos on Android?
While native Android camera apps do not allow users to record RAW videos, the MotionCam Pro app lets users tap into the potential of their phone’s camera system and capture RAW footage.
How do I shoot RAW videos on an iPhone?
Go to Settings>Camera>Formats and turn on the toggle switch next to ProRes. Now, go to the native Camera app to record RAW footage.
How much space does a RAW video take on a phone?
Typically, a minute of RAW footage occupies around 2GB of storage on your phone.
Read Also: HP announced Omen AI at CES 2025: Here is everything that has been introduced
Conclusion
This is how you can record RAW videos on your Android phone. The MotionCam Pro app works on most midrange and flagship devices, but it helps if your smartphone has a powerful processor to back it up. If you have any questions, let us know in the comments!










 English (US) ·