AeroPresses are lauded in the coffee nerd world for their ability to extract the delicate, nuanced notes in coffee, ease of use, and straight-up street style. It’s easy to be put off by one, though — they look a bit scary.
But is an AeroPress any good for the price? Considering the cheapest model is just $47 at Amazon right now, I think yes. We’ve tested the
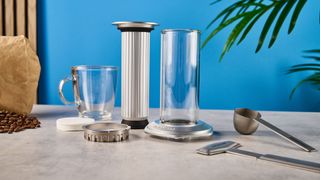
AeroPress Clearand the AeroPress Premium. You can experiment with coffee-to-water ratios to find your perfect brew, make cold brew, and even espresso-style micro-shots. It’s almost the same brew style as a French press, but then it’s got a similar flavor profile to a Chemex — lots of space for semi-comparisons, but no other brewing method quite hits the same.
How easy is an AeroPress to use? It’s actually not as challenging as you might think. You’ll need standard AeroPress filters (or the reusable AeroPress stainless steel filter, or the third-party
Prismo filter), good quality medium-fine ground coffee and just-under-boiling water.
My go-to AeroPress recipe
Although it may look daunting, making a delicious coffee with an AeroPress is actually as easy as ABC. Here’s my foolproof method.
Ingredients
- Medium-fine ground coffee
- 85° water
- AeroPress and provided filters
Step-by-step
Follow these easy steps (with pictures) to make excellent AeroPress coffee.
Step 1
(Image: © Future)
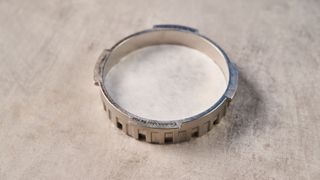
First, place the included filter in the filter cap. You can also get steel filters.
Step 2
(Image: © Future)
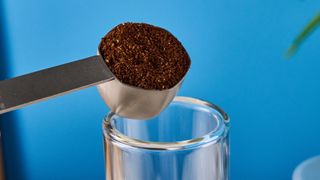
Screw the filter cap onto the chamber and pour one scoop (provided) of medium-fine ground coffee (not provided) into the chamber. You need about 18g/0.6oz of coffee.
Step 3
(Image: © Future)
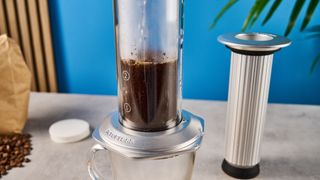
Tap the AeroPress on a surface to even out the grounds and secure the AeroPress to a sturdy mug. Pour in 85° Celsius/185° Fahrenheit water to your preferred level. Pour gently to prevent burns.
Step 4
(Image: © Future)
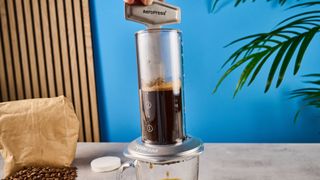
Stir with the provided stirrer, then immediately create a vacuum seal with the plunger. Wait 30 seconds. You have to be really quick between pouring, stirring, and creating the vacuum seal.
Step 5
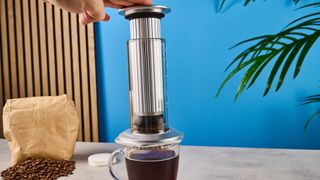
(Image: © Future)
After 30 seconds, start gently pushing down the plunger until all the water is expressed into the mug. Wait for the AeroPress to cool slightly (about a minute) and remove. Be careful not to push down too fast or too hard.
AeroPress vs moka pot vs French press
Coffee brewed with an AeroPress has a very specific flavor profile. It’s soft but not weak. It’s light but not watery. It’s complex but not overpowering. Other than espresso, it’s my favorite way to brew coffee.
I find that when I brew up using my moka pot, I’m greeted with a layer of silt on the bottom of my mug. Sometimes the coffee is a little bitter for my tastes, too.
I’m a vocal critic of French press coffee, too. It’s marred with similar issues that put me off moka pots — namely a silty bottom and bitter taste — but to a higher degree. AeroPress coffee has no grit and silt thanks to the paper (or steel!) filter, and the innovative, unique brewing process means your morning cup of joe is sans-bitterness.
Is an AeroPress worth it?
The short answer is yes. Then yes. Then yes again.
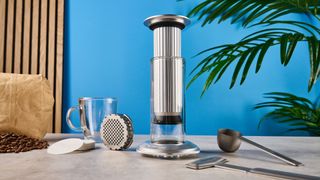
The long answer is a question that goes something like this. Do you dislike bitter, gritty coffee, and want a softer, more balanced coffee that’s ready in under a minute, and you don’t want to spend more than $50 on a fancy machine? If your answer is yes, then I’d recommend an AeroPress.







 English (US) ·